Designer Stamp® Gift Set - Best Teacher Gift EVER!

Three Designing Women®

blog hero 3.jpg

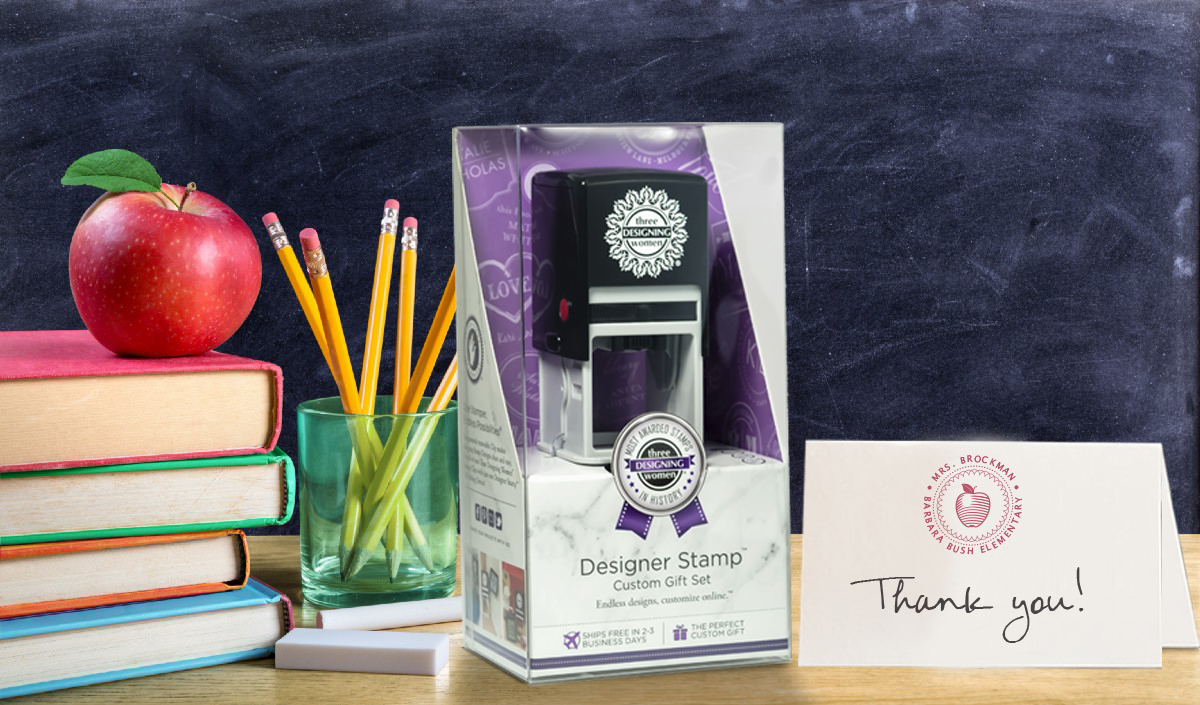
Teacher Appreciation Week is a way to celebrate the hard work and contributions of our teachers across the country. Show your appreciation and say thank you with our Designer Stamp® Gift Set. Here’s why teachers love this gift!


They get to choose from thousands of award-winning designs, including personalized and non-custom stamps. The patented removable clip makes changing stamp designs clean and easy. Browse our stamp designs here. 

TEACHER STAMPS.jpg

A Designer Stamp® Stamper is the ultimate classroom accessory. They’ll use it everyday for an assortment of reasons including:

  •   Stamping classroom books          
  •   Grading papers
  •   Labeling classroom tools
  •   From the desk of notes
  •   Paperwork to students, parents & faculty
  •   And much more!
Teacher.jpg

They are able to use interchangeable clips for their stamper. As well as different colored inks that are easy to change and add a vibrant splash! Browse our ink selection here. 

inks.png

Click here to find a retailer near you or online and buy a Designer Stamp® Gift Box for your teacher!

Posted
AuthorWeb Admin

DIY:

Easter Bunny Gift Bags

Three Designing Women®

Hero - horizontal 2.jpg

A cute and simple craft for your Easter celebration! These bunny gift bags are easy and fun
to make, and they’re perfect for take home treats and Easter eggs.


Materials:


Step 1:

Cut a V out of the top of your paper bag like the photo below.

Step 1.jpg

Step 2:

Stamp the bag with your Three Designing Women® Designer Stamp®.
To add more flare to the bags, use colored inks! Browse our selection of ink colors here.

Step 2.jpg

Step 3:

Stamp your printed tags with your Three Designing Women® Designer Stamp® and hole
punch the tag.

Step 3.jpg

Step 4:

Fill your bag with treats of your choosing. Then tie the bag together using string or ribbon and
thread it through your tag.

Step 4.jpg

Voilà! Your bunny gift bags are ready for your Easter festivities!

Step 5.jpg

Show us how your Easter bunny bags turned out by tagging us on social media!

DIY:

Take Home Pie Boxes

Three Designing Women®

Hero.jpg

Turkeys, pies, and mashed potatoes . . . oh my! With so much food brought to the table, there’s bound to be some leftovers! These pie boxes are great for your guests to bring home, and a wonderful memento for them to remember you by!

Materials:

Step 1:
Cut out the templates for the pie box with your x-acto knife or scissors.  

Step 1 (cut template).jpg

Step 2:
Fold the template on the dotted lines. 

Note: Scoring the lines with a bone folder or the back of your x-acto knife before folding will make it easier to fold. 

Step 2 (fold template).jpg

Step 3:
Glue your folded tabs to the side adjacent to it. 

Step 3 (glue tabs).jpg

The end result should look something like the picture below. Repeat the first three steps to make the lid and bottom of the pie box. 

finished box.jpg

Step 4:
Using your scalloped hole puncher, punch a hole into your white card stock for your tag.

Note: If you do not have a scalloped hole puncher, use scissors to cut out a shape for the tag. 

Step 4 (punch).jpg

Step 5:
Take your Three Designing Women® Designer Stamp® and stamp your newly made tag.

Step 5 (stamp tag).jpg

Step 6:
With the regular hole puncher, make a hole at the top of your tag for the twine. 

Step 6 (punch tag).jpg

Step 7:
Cut the twine (at least 18” in length) and string it through the hole in your tag. 

Step 7 String Tag.jpg

Step 8:
Place your scrap paper underneath the tissue paper, and begin to stamp it. Don’t worry, it doesn’t have to be even.

Note: Make sure you place the scrap paper underneath the tissue paper before you begin to stamp. Since the tissue paper is so thin, it WILL bleed through.

Step 8 (stamp tissue).jpg

Step 9:
Stuff the pie box bottom with the tissue paper. Make sure the right side is up!

Step 9 (stuff tissue).jpg

Step 10:
Go ahead and put the lid on the bottom portion and wrap the twine with your tag around the entire box. 

Note: To secure the twine in place, tape the twine on the bottom of the box.

Step 10 (tie tag).jpg

And presto! Your take home pie box is now complete!

Step 11 (finished box).jpg

Show us how your pie boxes turned out with our social media pages!

Click here to download the free template.

halloween_post.jpg

Click here to download the free template.

Posted
AuthorWeb Admin